Spring is almost here, which means it’s a great opportunity for DIY projects to start again.
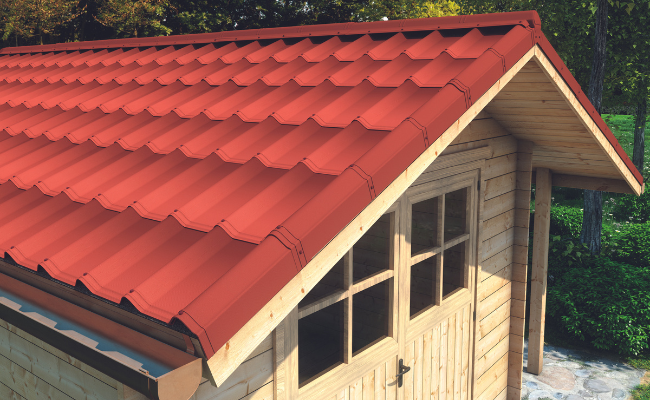
Luckily, Southern Sheeting’s newest product Onduvilla is an ideal solution if you’re looking for roofing tiles which boast the look of expensive and heavy clay, but which are lightweight and just as attractive.
Onduvilla Roofing Tile strips are made from recycled materials and can be laid on roof decking or close boarding.
It is an ideal DIY roofing material for sheds, garden rooms, car ports, summer houses and stables and is also quick and easy to install.
Supplied in packs of seven strips of tiles, Onduvilla efficiently covers the roof with a water-tight system. It is available in warm natural tones such as red or slate and comes with a 3D shadow line system to optimise the look. It is guaranteed to stay waterproof for 15 years.
This roofing system is free from metal, which means it will not rust and gives it real staying power.
In addition to the tiles, Onduline also provides verge pieces for side walls, slim caps for the ridge, closure caps for the ridge-ends and foam fillers for the eaves and fasteners to better protect your roof.
Here’s our step-by-step guide for beginners.
Before you start
Remember to install all the elements, including the tiles, in the opposite direction to the prevailing winds.
To install your Onduvilla Roofing Tiles, you will need an electric screwdriver, a pen, a knife, a spirit level, a measuring tape and a saw. You will also need to wear gloves and safety glasses, and work on a stable support to ensure your safety.
Before beginning, check the structure and slope of your roof.
Onduvilla products are recommended for full deck or discontinuous roof structures with a pitch of at least 15 per cent. For discontinuous structures using wooden battens, a higher pitch is required.
It’s important to check these points to ensure the best results and that your new roof stands the test of time.
Get building
Now calculate the number of tiles you will need. A pack of Onduvilla Roofing Tiles will cover a net surface of 2.17sqm.
You can then start the installation at the eave by positioning a rope at 5cm from the roof, at the edge of the roof, on each side of the roof.
Then position the foam fillers which will be covered by the first row of tiles.
To optimise the look, the 3D shadow line should be aligned to the upside of the roof.
Installation of the tiles is carried out from eave to ridge.
To achieve a perfect alignment, use a rope for reference. Install the first row of tiles from side to side.
For the second row, start with a shorter tile. Onduline recommends cutting the tile after the second corrugation.
To ensure good watertightness, align the overlapping guides.
Fasten the Onduvilla tiles between the two embossed lines on the top of the corrugations using Onduline Fixings and fasteners.
Make sure you don’t overdrive the fasteners into the corrugations during the fastening process.
For the last corrugation, do not fasten until the corrugation is overlapped by either the next tile, or an accessory.
On the verge
Now it’s time to install the . For the ridge use the remaining part of the foam fillers and start at the edge of the roof with a closure cap.
Continue with the rest of the ridgeline using slim caps.
The overlapping of the slim caps is secured by using the embossed lines.
The fixing is carried out with Onduline fasteners through the corrugations of the tiles.
Finally complete the ridgeline using a second closure cap at the end.
Now that you have all these top tips to hand, you’re ready to begin!
Order your Onduvilla Roofing Tiles here today! We also supply a range of Onduline Roofing Sheet Accessories that help to create the ultimate finish.

